
#
Step 1 - Getting started
Available in beta only
This is available in beta for now. Be aware that some performance issues might occur.
Welcome to this tutorial for building Quable PIM applications with Express.js and EJS.
#
Benefits
Session Management: The template provides robust session management capabilities, ensuring secure and efficient handling of user sessions within your Quable PIM application.
Multitenant Support: With built-in multitenant support, your Quable application can serve multiple customers, keeping their data and operations separate, scalable, and efficient.
#
Tech stack
Express.js (TypeScript): The back-end of your application is built on Express.js, using TypeScript for enhanced type safety and improved developer productivity. This combination provides a robust and scalable foundation for your Quable PIM application.
EJS (Embedded JavaScript): EJS is the templating engine used in your application, allowing you to dynamically generate HTML pages and render data on the server side, providing a seamless and interactive user experience.
Prisma: Prisma is used for database management and ORM (Object-Relational Mapping). It simplifies database interactions and ensures a clean and maintainable data layer, enhancing the efficiency of your application's data management.
#
Requirements
You need to create a partner account and have a quable PIM instance for testing.
You must install Node.js if you don't already have it.
You must install a node package manager: either npm, yarn or pnpm.
You must install our Quable CLI tools:
sudo npm install -g @quable/quable-cliYou need to install a reverse proxy tunnel tool to expose your local web server to the internet. The most popular are Cloudflare, Serveo, Ngrok, Telebit and Localtunnel.
#
Create an app
You can create a new Quable application with following steps:
- Navigate to the directory where you want to create your app.
Your app will be created in a new subdirectory.
- Run one of the following commands to create a new app:
quable app create- Choose your developpement platform (Nodejs)

Congratulation, your created your first quable application !
#
Start your app
After creating your app, you can start local development, but you need to expose your local server on the internet. To achieve this, use a reverse proxy. The Quable CLI can create a tunnel that enables your app to be accessed using an HTTPS URL. Also, you can run your application with a custom tunnel URL.
We recommend Serveo for its ease of use. No installation, no signup required. Similarly, Telebit is quite simple to use, you will find the instructions for its installation on the website.
The
quable-clinatively integrates Serveo, Cloudflare and Telebit, and thus allows to automatically start a tunnel on the port of your application.
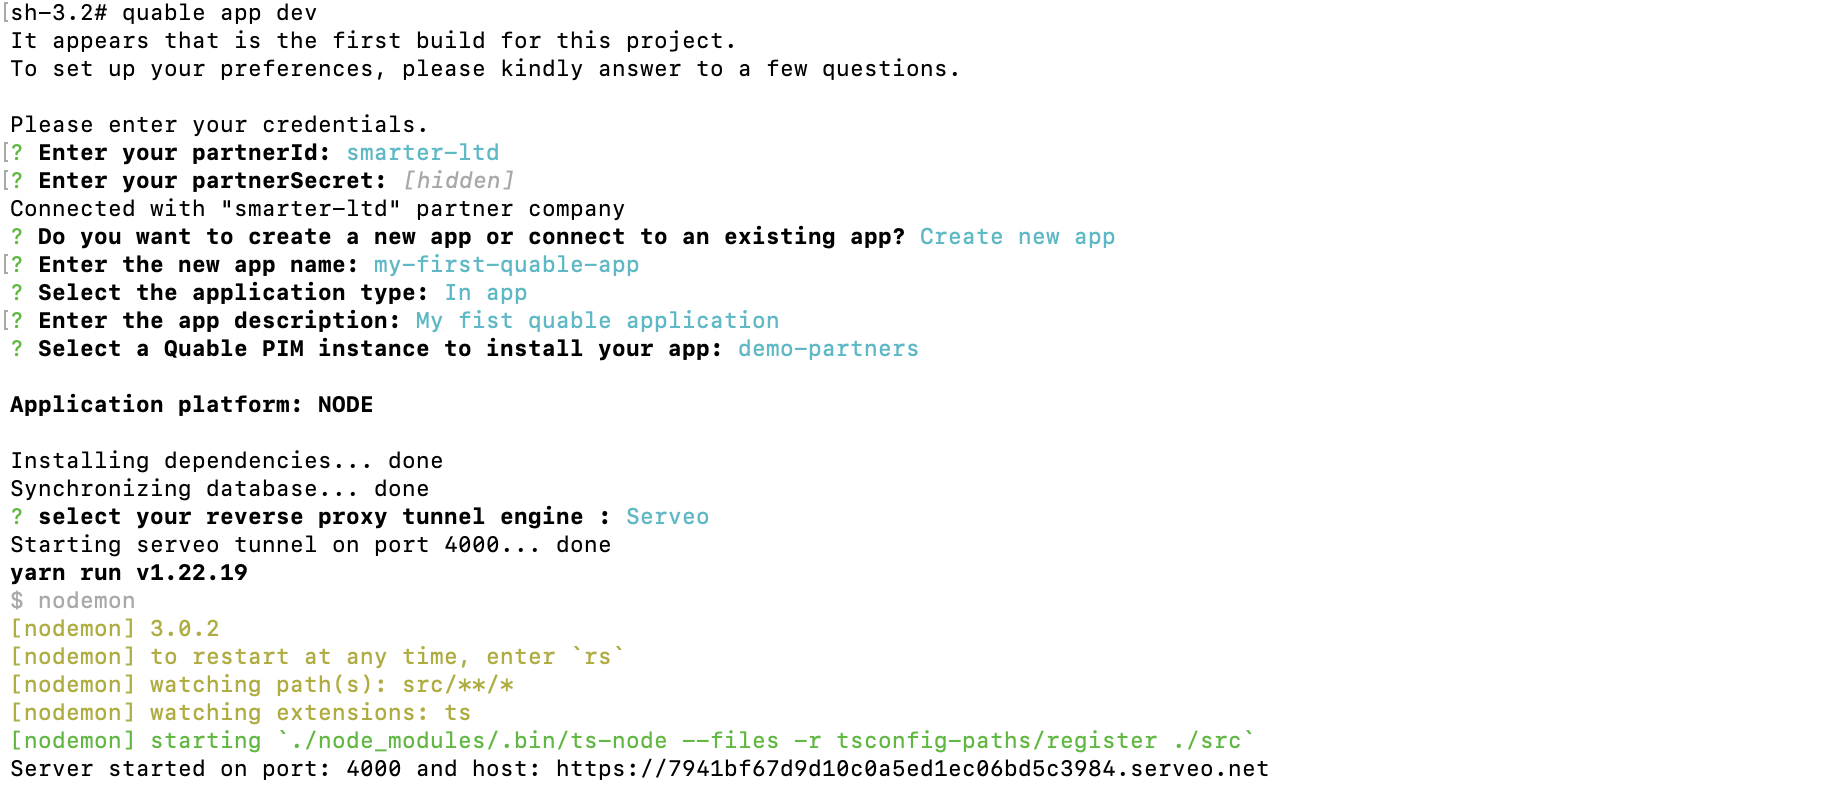
1- Run the following command
quable app dev2- If is the first time, you may need to answer to few questions
3- Once you are connected with you organisation, you can choose the instance to test your application
4- Finally, choose your reverse proxy (Recommandation: serveo) and wait few seconds to access your app.
Server started on port 4000 by default. If the port is already used, a random port will be chosen
You app will automatically open in your browser.